The Fab Academy 2014
Digital Fabrication Laboratory. Department of Architecture.
Institute of Technology. EPS-CEU San Pablo CEU University
Adolfo Gutiérrez Sánchez
Architect
The Fab Academy 2014 Digital Fabrication Laboratory. Department of Architecture. Institute of Technology. EPS-CEU San Pablo CEU University |
Adolfo Gutiérrez Sánchez Architect |
|||
| Home | Portfolio | Files | ||
| ELECTRONICS DESIGN |
|
The assignment The assignment for this week was to redesign an existing board with Eagle software and to build it. The purpose for it was to get in touch with the eagle software and with the components we are going to be using in this semester. The existing board was fiven by Neil in the fabacademy website. Both the traces and the outline was only given in this link. Following the tutorial was very easy to start using Eagle and add the components needed: a LED and a BUTTON. |
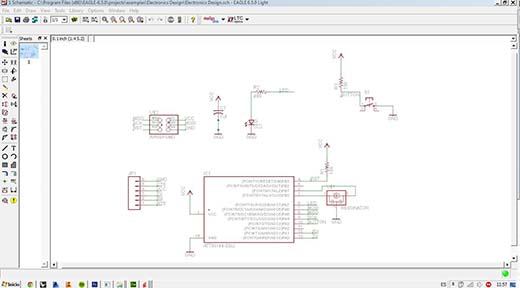
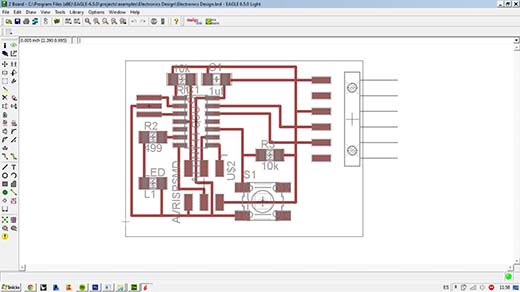
The board design Once downloaded all the necessary software to run Eagle in my computer, I started the tutorial step-by-step as I had not even seen that program before. The porgram is divided into two screens: - Schematic design.- each of the components you add into Eagle has its own dependant components, that may be capacitors or resistors. In ths screen you decide each component needs. You are going to draw a small circuit naming each of the elements you introduce and connecting them into the other components just labelling the wires. Each of the needed elements by each component are shown in the DATA SHEET of each component. - Baord Design.- once you have designed how the components are going to be connected each other, in this screen is where you are going to decide the final layout of the board, trying to be as samall as possible for saving cutting board.
Once the board was designed, I exported the design into two different files: - Traces PNG.- as in the Modela you have to change the mill, you have to cut the board in two parts. This will be the tracing for marking the board and extract the cupper from the top surface. - Outline PNG: this layout will be the one that will cut off the entire board from the bigger board and will allow you tu extract the final shape in order to start welding.
Done that, we can start cutting with the Modela. Before that, I did some customization of the board putting some text that will be marked in the first attempt. If we have not done the cutting with the Modela before, we can follow this tutorial form the two weeks ago.
|
 |
 |
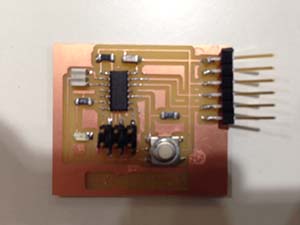
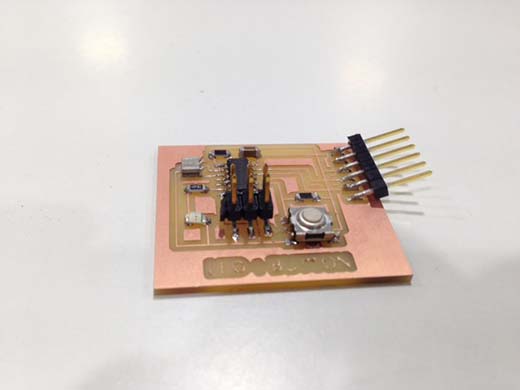
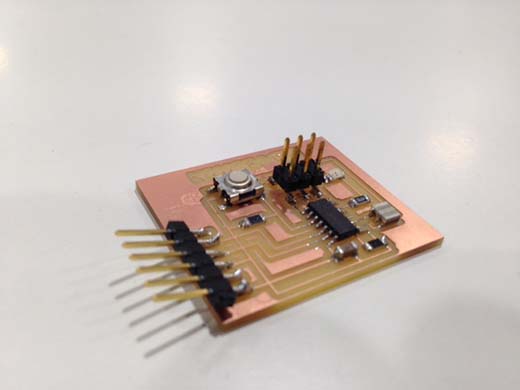
Welding the board Welding the board was the easy part of the assignment, as there were a few components to weld. The process was the same done two weeks ago. One important thing before welding, is to assure that we are putting the components in the good direction. Both the LED and the BUTTON have an specific way of placing into the board as the polarity is not the same in every point of the internal circuit. We can check those things in the DATA SHEET of each component. This week has no assignment of programming the board, so after the welding the assignment is finished. Here we can check some pictures of the board when the welding was done. |
|
 |
 |